
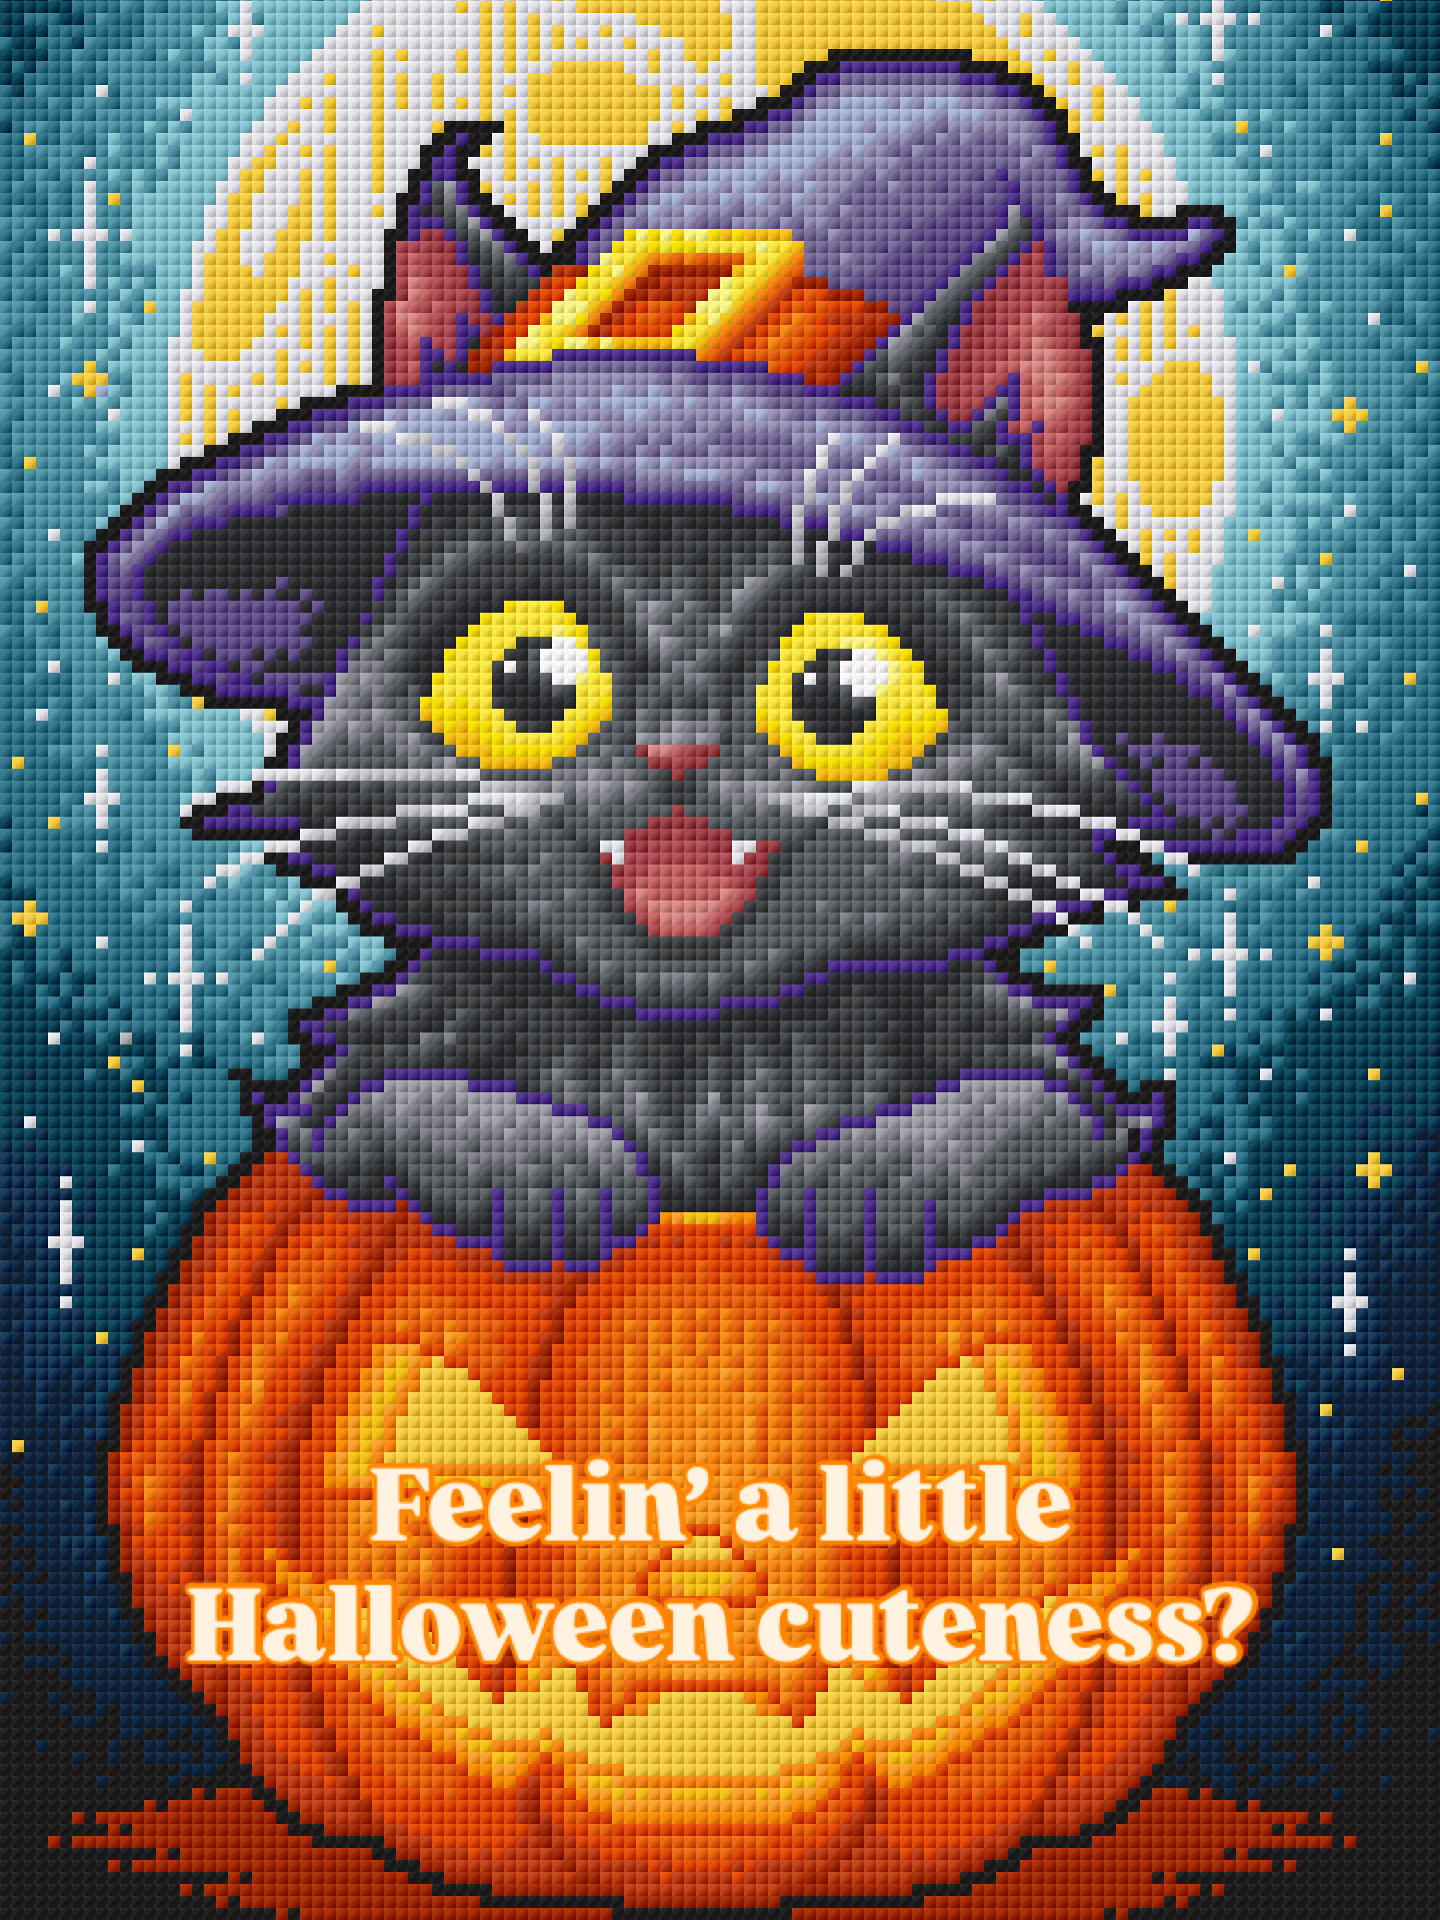
This is from a story I posed on my Instagram that my husband thought would be great to have made into a full post. This is a quick view of my design process in Procreate; I’ll try to do a second part on the charting end I do on my laptop eventually. But as it is, this might be a fun glimpse into the process for those curious if I actually do draw every pixel lol
Swipe through to see each step, with a bit of explanation too on my thought process. I hope this inspires you to make your own pixel art, and if you want to have your own pixel art created into diamond paintings, just message me on my Instagram or FaceBook and I’ll chat with you on my process!

I usually start out at a larger size, and slowly scale it down and redraw it each time it gets smaller. This allows me to keep the elements in place, but also acknowledge how much detail can realistically work at the small size for diamond art. This is important to figure out shadows and highlights early on, too.

Once I have a sketch I like, at the correct size, I do one final clean outline pass. Having a good, crisp border is really vital to good pixel art, and is one of the easiest ways to know if something is just AI dropped into a program, or actual art with intention.
Color palettes are tricky, but I’ve started to get a handle on them. I’ve built all of the DMC colors into palettes in Procreate for reference, since diamond drill colors are based on those. It was a beast to do, but worth it!
Finding the colors is really vital. They can’t be too close to each other, but then again they can’t be too bright or dark too quickly. I aim for at least 2 lighter colors, the “main” mid color, and then 2-3 dark shades.

I recommend working with just one color for one element on it’s own layer – you can merge them down after a while if you really want to, but having them all separate allows you to quickly change the color if you find something is off.
So for this, I have each shadow and highlight for the hat on it’s own layer.
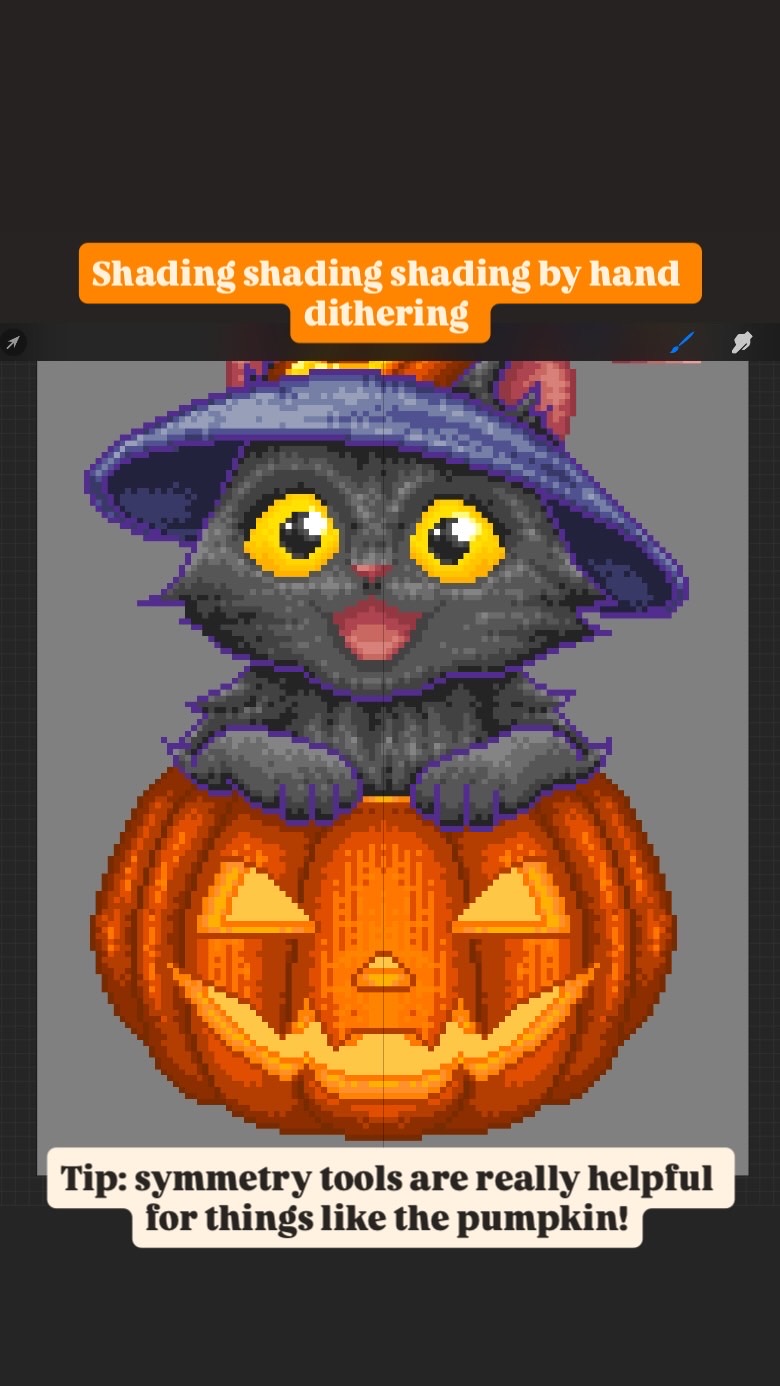
“Dithering” is kind of like creating little droplets of the adjacent colors to create a gradient without adding more colors.
I love being able to set symmetry for designs, because otherwise it’s really annoying to have to draw it twice, or copy/paste every time.
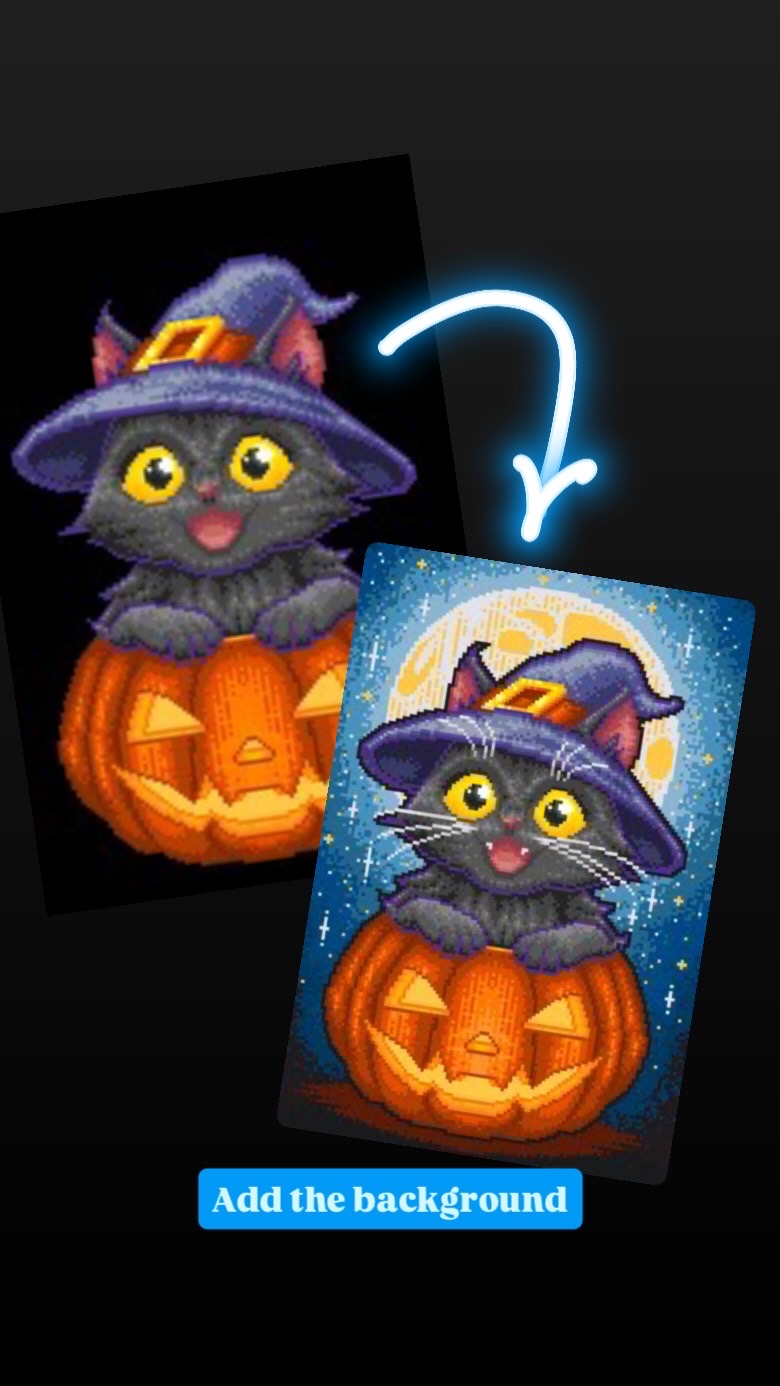
So backgrounds are the bane of my existence. It’s kind of why I love doing this space and galaxy burst backgrounds.
I created a custom brush that does a little scatter of 1 pixel dot that allows me to easily blend from one color to the next, creating this starry glow. It took a long time to get it right, but it’s a great help!
Also, I love drawing star bursts. Like too much.
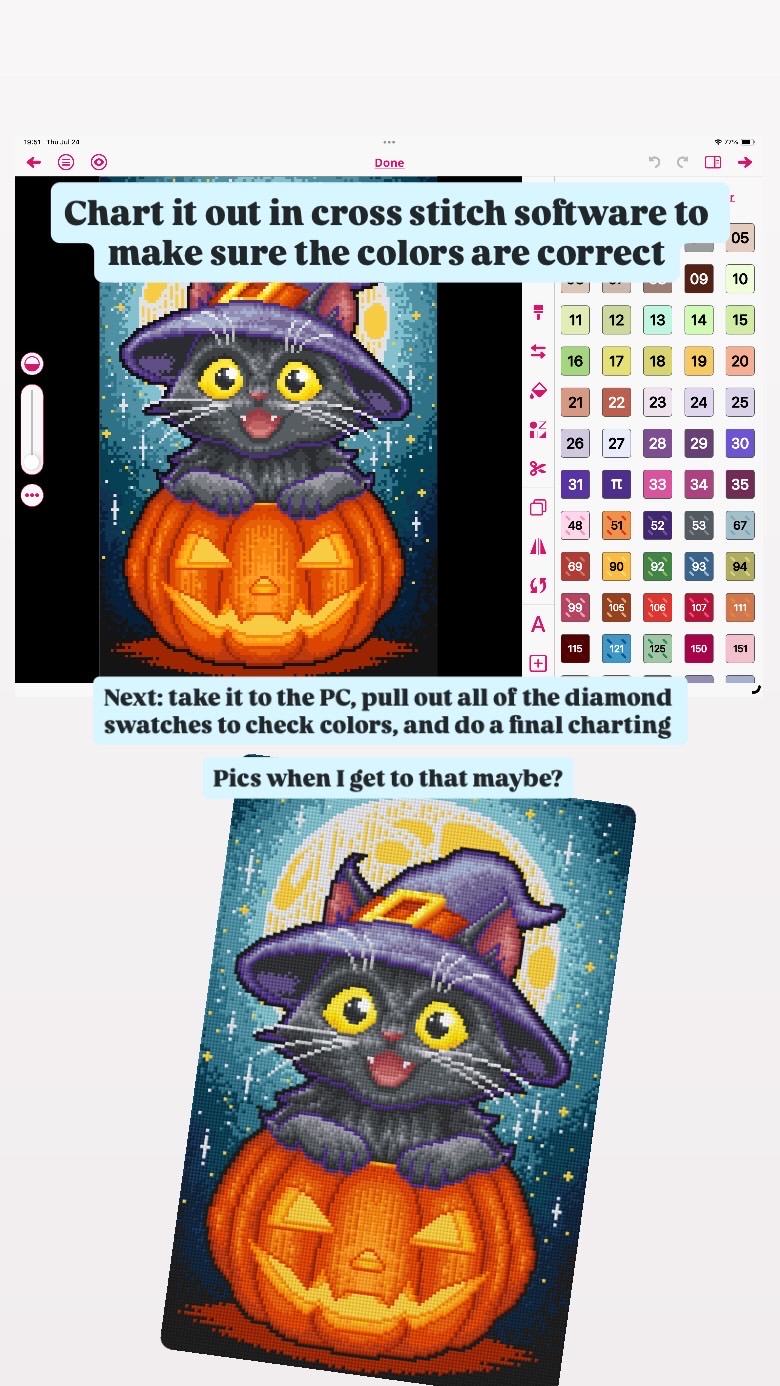
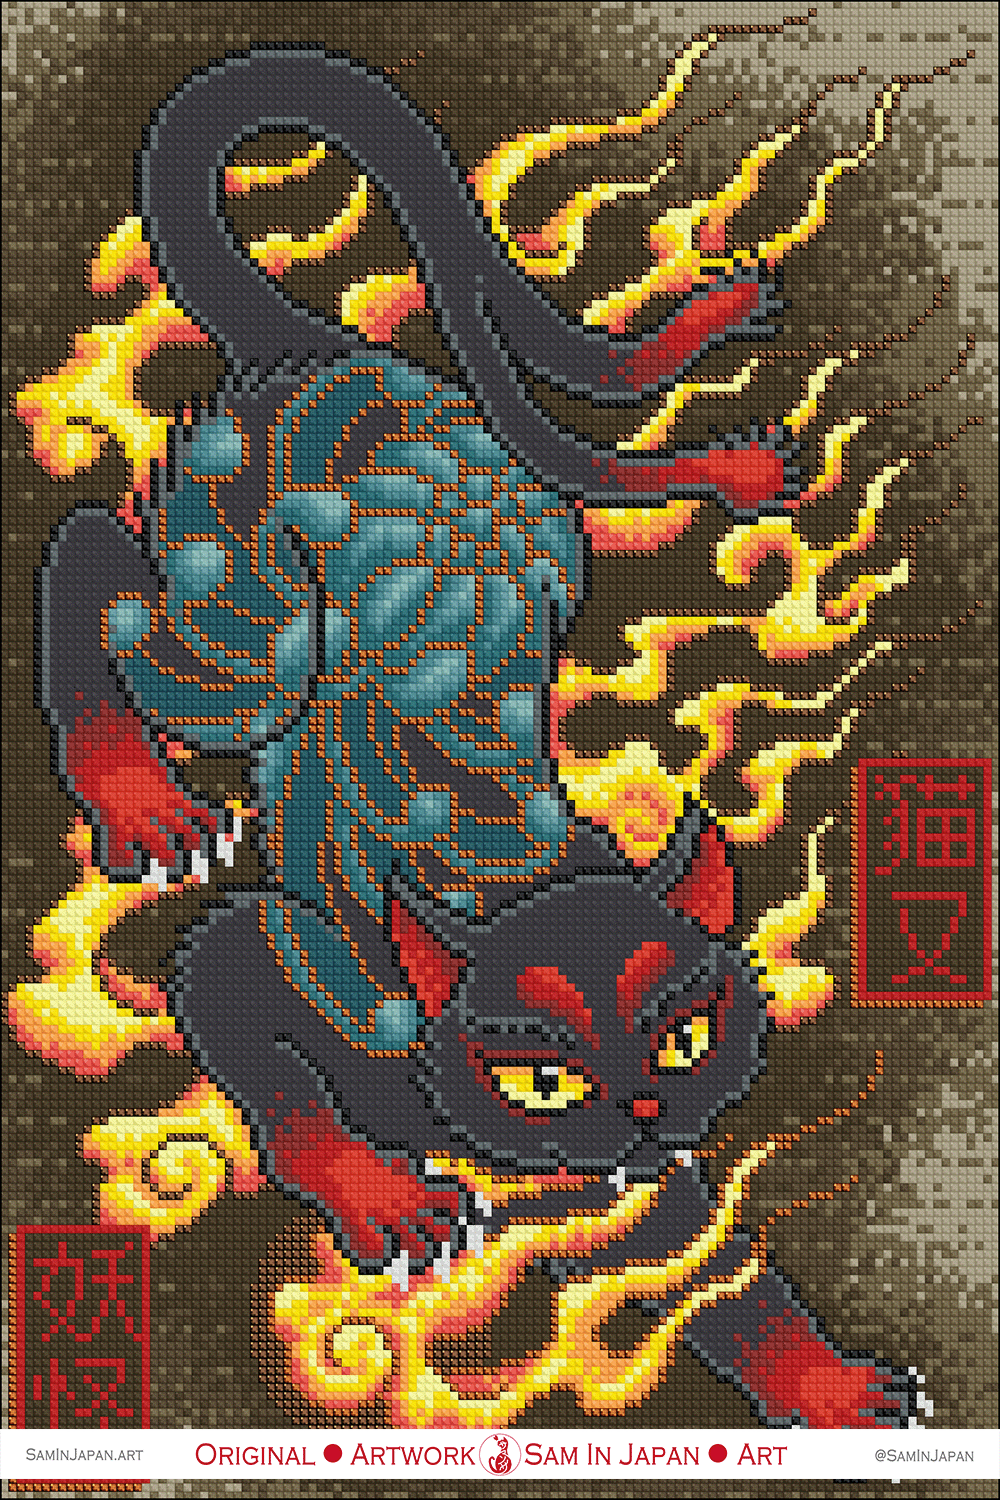
I use a cross stitch program on my iPad to quickly check how it would look in DMC colors, and to make sure my palette is blending how I like.
DMC are embroidery thread colors that are standardized, and are the same standardized colors that are those numbers for the drill colors when you order a kit. While the software doesn’t let me declare things as glittery or ab or glow in the dark, it gives me a good idea of how it’ll come out. I check this kind of generation regularly as I’m designing, not just at the end.
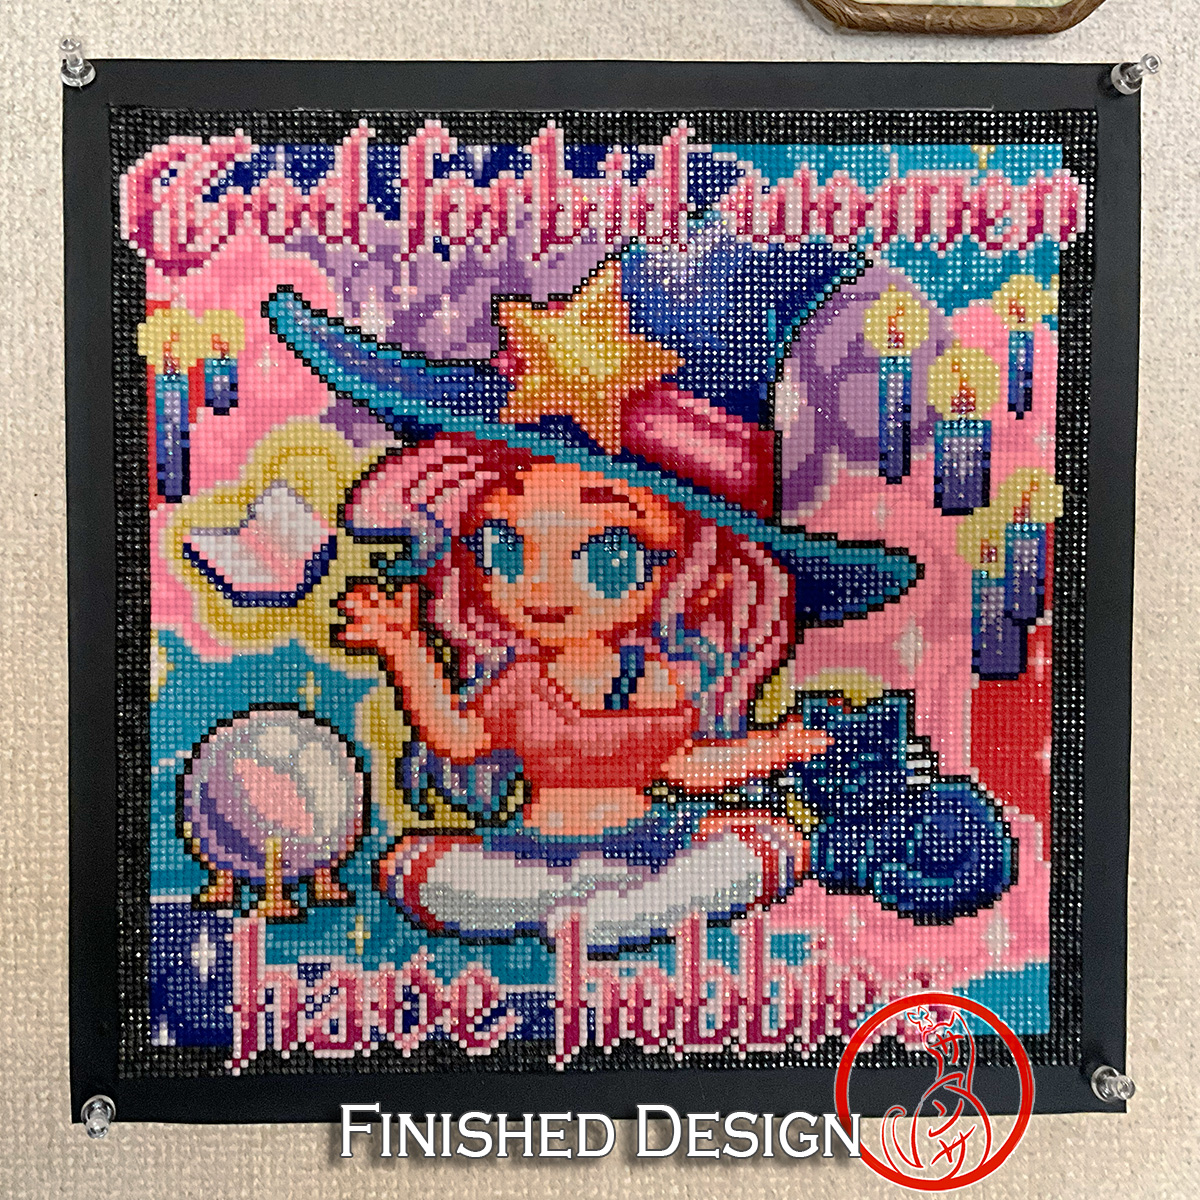
Then I take the pixel art to my laptop, import it into an advanced cross stitch program, and fine tune it and pick the drill colors, clean it up manually, and get it ready in a format my kit creator can use!
Oh, and I have a huge set of color swatches of drills so I can check the color I am assigning to the drill in reality to make sure it looks how I want it to when you ultimately create it. I’ll snap a pic the next time I have them all laid out on my table, trying to pick the best colors lol
It’s a huge process, sure, but it’s really worth it for the final design.


Leave a Reply